Loading

Free Photoshop Brushes

Glow Brushes for Photoshop

Description:
Those brushes are big (1000px+) and as always – you can do whatever you want with them – free for priv and comm use :)
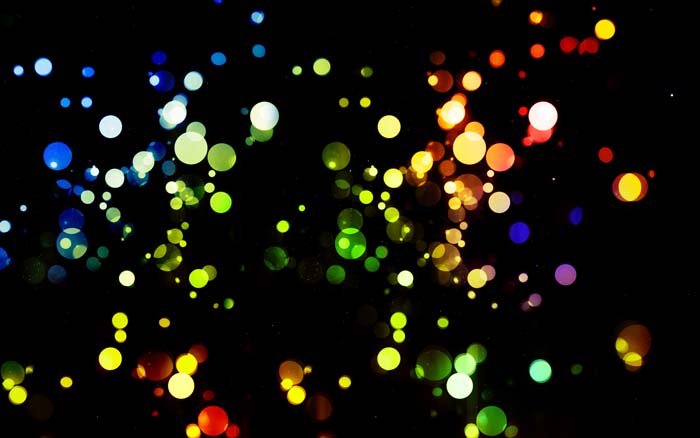
there are many brushes inside but they didn’t fit the preview :) so don’t mind the preview :) it’s all about your creativity.glow

Free-Photoshop-Brushes
Source File http://www.brusheezy.com/brush/1429-Glow-Brushes-II

IHEA Vector Curves Brushes

for Photoshop


ihea_vector_curve_brushes.jpg
Source File http://getbrushes.com/vector-photoshop-brushes/ihea-vector-curves-brushes

Brush Details

File size : 1.2 MB
Photoshop version : CS2 and higher.

Related Post:
Wedding Photography with Photoshop Brushes
  • http://kewlshare.com/dl/9966e52002e0/9objects_brush_by_iceSkar.abr.html
  • http://kewlshare.com/dl/27f1c02c584d/61Particlesandstars.abr.html
  • http://kewlshare.com/dl/2f0aafbbe675/149-grunge_brushes_by_szuia.abr.html
  • http://kewlshare.com/dl/c8495d6c724d/198-shape.abr.html
  • http://kewlshare.com/dl/d5f75cf6b681/Abstract_Vector_Brush_Set_by_Bl4ck_and_wh1te.abr.html
  • http://kewlshare.com/dl/ad90ddbcb2aa/Alesstyle_Bubble_Brush_by_TheAlessandro.abr.html
  • http://kewlshare.com/dl/df2390963c99/Angels_brush_by_Arxontisa.abr.html
  • http://kewlshare.com/dl/49180b063211/Anime_Eye_by_squex.abr.html
  • http://kewlshare.com/dl/a4c2e833b058/Backlit_Cloud.abr.html
  • http://kewlshare.com/dl/aa5a5287b517/Bubble_by_titoff77.abr.html
  • http://kewlshare.com/dl/32bb68377420/Cars_Logotype_Brush_Set_by_schmitthrp.abr.html
  • http://kewlshare.com/dl/bd58fe343f83/CF_Vector_Set_1_PS7.abr.html
  • http://kewlshare.com/dl/d14d935b13a8/Connecting_Brush__s_by_Chimik.abr.html
  • http://kewlshare.com/dl/0b979bb97008/Cute_Face_PSCS2_Brush_by_xlilbabydragonx.abr.html
  • http://kewlshare.com/dl/372b502a68b/DB_Graffiti_Arrow_Brush_Pack_by_SikWidInk.abr.htm

Read More

Frame Collection

Free Frame Collection


Free Download Frame Collection PSD
File Size 16.7MB.Dimension 2000*1500
Download


Free Download Frame Collection PSD
File Size 5.29MB.Dimension 1771*1181
Download


Free Download Frame Collection PSD
File Size 29.2MB.Dimension 2551*2551
Download
Password Here

Related Post:
AMS Framing Studio v2.97
Download Frame Photo
Wedding album templates PSD
Read More

CorelDRAW Graphics Suite X5

CorelDRAW Graphics Suite X5 v15.0.0.486 Portable

CorelDRAW Graphics Suite X5 v15.0.0.486 Portable
CorelDRAW Graphics Suite X5 v15.0.0.486 Portable | 212 MB

Put the power of CorelDRAW® Graphics Suite X5 behind your ideas and make a bold impact across any media. This versatile graphic design software has it all—vector illustration, page layout, photo editing, tracing, Web graphics and animation in one tightly integrated suite. Designed for professional and aspiring designers alike, it offers a quick, intuitive workflow, high-value digital content, market-leading file compatibility and graphic design tools that let you do more than you thought possible!

Creativity and power come together in CorelDRAW Graphics Suite X5. With increased speed, more accurate color control, enhanced vector illustration tools and new Web capabilities, it’s a must-have for any designer. Get going quickly with new professionally designed templates and learning materials. Find graphics, fonts and images on your computer faster than ever with new Corel® CONNECT. Re-purpose and share your creations anywhere with expanded file compatibility. Then output everywhere, from Web banners and animations, to logos, custom signs and more.

* More speed with new multi-core support
* More rich content and professional templates
* More learning tools, video tutorials and expert tips
* More compatibility, with support for over 100 file formats
* More color control and consistency
* More Web capabilities, including Flash animation support
* More output options for print, Web, digital signs and more

All-in-one professional graphics suite

Find everything you need for professional graphics illustration, layout, tracing, photo editing, Web graphics and animation in one complete suite of integrated applications that is easy to learn and use.
Easy to learn and use

Start smoothly and learn quickly with built-in learning tools, valuable video tutorials, design insights from experts and a visually rich, online guidebook. (A hard cover, full-color, printed guidebook is included with the box version.)
High-value digital content

Enrich your designs with over 1,000 professional fonts, including Helvetica®, Garamond® and Frutiger® fonts for the first time ever. Plus, take advantage of high-value digital content, such as premium clipart, royalty-free photos and vehicle templates.
Precise control and easy sharing

Output to a broad variety of media, from distinctive logos and signs, to striking marketing materials, Web graphics, billboards and car wraps. Export options let you compare file formats before export, so you can optimize your settings to achieve the highest file quality.
Market-leading file compatibility

Re-purpose and share your creations anywhere with market-leading file compatibility. Import and export files quickly and easily with dozens of supported file formats, including PDF, JPG, PNG, EPS, AI, TIFF, PSD and DOCX.

System Requirements:

* Microsoft® Windows® 7, Windows Vista®, Windows® XP, with latest service packs installed (32-bit or 64-bit editions)
* Intel® Pentium® 4, AMD Athlon™ 64 or AMD Opteron™
* 512 MB RAM (1 GB recommended)
* 750 MB hard disk space (1 GB for typical installation without content). Up to 6GB needed to install extra content
* Mouse or tablet
* 1024 x 768 screen resolution (768 x 1024 on a Tablet PC)
* DVD drive
* Microsoft® Internet Explorer® 7 or higher.

Download (Hotfile):
Part 1
Part 2

Mirror (Uploading):
Part 1
Part 2
Read More

UltraSlideshow Flash Creator Professional v1.23

Ultra Slideshow Flash Creator Professional v1.23 Portable

UltraSlideshow Flash Creator Professional v1.23 Portable
UltraSlideshow Flash Creator Professional v1.23 Portable | 18.4 MB

With UltraSlideshow, you can create gorgeous photo flash slideshows for watching on computer, burn the auto-run flash photo album to gift CD/DVD, build a web gallery with amazing flash slideshows with dynamic SWF + HTML + XML files, or upload the slideshows to our free web album Go2Album, and then embed the slideshows to your personal website, MySpace, Blogger, Friendster and many other social networking websites.

*Creating SWF Slideshow
UltraSlideshow creates XML-driven dynamic flash (SWF) slideshows. This SWF flash slideshow software requires little flash skills to create up nice flash slideshows. Simply with photos, music, and transition effects and flash slideshow templates that we have prepared for your easy selecting, you can make stunning SWF flash slideshows.

*Making Photo Album
UltraSlideshow is the photo album software that can be used to build up photo sharing web album, art album, product gallery, news photo album, and many other types of photo albums. UltraSlideshow helps you create gorgeous photo album slideshows with music and transition effects, and lots of beautifully-designed flash templates.

*Building Flash Gallery
UltraSlideshow is the flash gallery builder that can build photo gallery in XML-driven flash. UltraSlideshow provides many customization features for controlling the appearance of the flash gallery. You can create slideshow that fits into your existing web design: width, height, border color, background color, thumbnail size, etc.

Enjoy your flash slide shows!

Homepage - http://www.ultraslideshow.com/

Download Links:

HOTFILE | UPLOADING
Read More

AMS Framing Studio v2.97

AMS Framing Studio v2.97 Portable

AMS Framing Studio v2.97 Portable

AMS Framing Studio v2.97 Portable | 4.84 Mb

Framing Studio is a photo embellishment tool that allows you to add stunning photo frames and various border effects to digital images. Program's intuitive user interface allows you to use its features quickly and efficiently. Framing Studio supports cropping, resizing and rotating photos. You may also use special effects. The distribution kit includes more than 70 frames. Framing Studio contains flexible printing options.

Features
1. The ability to add simple borders.
2. The ability to apply masks to images, allowing you
to make interesting alterations to photos.
3. The ability to add artistic frames.
4. The ability to add vector frames.
5. Allows to rotate, crop and resize images.
6. Allows to adjust color balance.
7. Ability to apply special effects (sepia, mosaic, wave, etc.)
8. User-friendly interface.
9. Contains flexible printing options.

Home Page - http://ams-soft.com/framing/

Download Links:

Related Post :
Frame Collection
Download Frame Photo
Read More

PhotoZoom Classic 3


Unhappy about the quality of your digital image enlargements? Resize your images using BenVista PhotoZoom Classic 3, and get superb results through our unique, award-winning S-Spline technology!

Higher Quality: PhotoZoom Classic 3 is specialized in enlarging digital images while preserving quality. Equipped with BenVista''s patented S-Spline technologies, this software easily surpasses alternative solutions such as Photoshop''s Bicubic interpolation.

Besides the original S-Spline technique, which made previous PhotoZoom versions famous, PhotoZoom Classic 3 also offers S-Spline XL. This improved generation of BenVista''s award-winning technology creates even higher quality image enlargements. Now also included: a special setting that removes (JPEG) compression artifacts and noise. Perfect for images originating from the Internet!

Features & Ease of Use: This software is extremely easy to use. It comes with handy presets that are specially designed for different types of photos and graphical images. In addition, you can manually fine-tune the sharpening settings. That way your images will never be too sharp, and never too soft. The large preview window instantly gives you a preview of the end result, which makes it a piece of cake to determine the optimum settings for the given image. Also very convenient is the new crop function, which allows you to select and resize a specific portion of the image. Ideal for spectacular close-ups.

Conclusion: PhotoZoom Classic 3 is not just an outstanding image enlarger. It is also extremely easy to use. An absolute must-have for digital camera owners and anyone who wants to enlarge images without losing quality.

Featuring:
  • Outstanding image enlargements through our award-winning S-Spline interpolation technologies
  • Reduction of compression artifacts and noise
  • Additional sharpening settings
  • Powerful crop tool for spectacular close-ups
  • Increased image support (metadata, ICC profiles, color spaces)
  • Compatible with the latest versions of Microsoft Windows and Mac OS X


Free Download
www.benvista.com
Read More

Adobe Photoshop CS4 Extended + Portable + CS4 Micro

Free Download - Adobe Photoshop CS4 Extended + Portable + CS4 Micro (Update & Fix Error 2010)
Adobe Photoshop CS4 Extended + Portable + CS4 Micro (Update & Fix Error 2010)

Adobe Photoshop CS4 Extended + Portable + CS4 Micro (Update & Fix Error 2010) | 1.0 GB

Adobe ® Photoshop ® is a software standard and leader in editorial and image processing professional, you can do more things with Photoshop. Creative tools help you do it the results extraordinary. Abilities are not great yet will help you spent time with Photoshop for all your work. Simultaneously with multiple effects editing, processing and transform the image of your work will be resolved one way really quickly.

Set of professional tools
* The creation or use of photos on the original images using the tools are grouped to draft clear, paint and edit.
* File Browser File Browser Tools complete
With this tool you view and organize photos quickly, before looking into editing software; besides it made the job automatically for a series of photos as fast (on the file name in type, make changes in the size range, apply the script for a series of batch files ,...).
* Customized workspace
In the course of work, the best way is how you arrange the components so that really comfortable, with the options and features the perfect combination of keyboard shortcuts, you will customize a reasonable space for your work and save the space for this work later.
* Group History
Enhance the ability of test tools and recovery (undo) and repeat (redo) many operations you have missed. That is very good and safer for the work you're doing.
* Library Filters - Filter Gallery
With improved ways to work with filters, consider the filter through the library filters separate groups (Filter Gallery) you can preview and compare the effects between the filter easily and effective.

Graphic design
* Layers (class)
To reduce the complexity of managing a collection of photos, text text, and effects on hundreds of layers, you can group them in sets (set), set color representation, and lock or turn off depending on circumstances.
* Layer Comps
The graphic design for diverse clients with different effects will be easier to save the file into a separate Layer Comps.
* Write the word path
You can type text along a path and adjust its path similar to Adobe Illustrator ®.
* Artistic brushes (The art of pen strokes)
With the pen tool features art will quickly create visual effects is actually faster, minimizing the design time.
* The special effects filters
With more than 95 special effects filters, and lets see the image before applying. You will create a lot of really great performance for the picture or artwork of your own.

http://www.downarchive.com/

Update : 03/16/10

Free Download Photoshop CS2

Software name Adobe Photoshop CS2
License: Shareware
Date Updated: December-15-2009
Category: Image And Desing
Date Added: May-18-2007
File Size: 329.02 MB
Latest version: Adobe Photoshop CS2

Request for authorization code photoshop cs 2


serial number 1045-0436-9551-0266-5984-9386
activation number 1499-2508-0747-9541-5081-3341-3392
activation type normal 93 : -13
Read More

Wedding Photography with Photoshop Brushes

Since I know many of you are, one way or another, involved into weddings whether it be as a friends, family or wedding photographers it is always nice to have some cool photos from the occasion. So, I thought I’d show you how to decorate a wedding photo with Photoshop brushes.
In this particular example we used two different brushes from two different brushes sets:
  1. Swirls 2, Photoshop brushes set (36)
  2. Photoshop Brushes – Floral Shapes (37)
Here is the final outcome:

Wedding Photography
And here is how we got there.
1. Load a plain photo in Photoshop

2. Load first brushes set, in this case Swirls 2, Photoshop brushes set, 36
(Click here if you need to find out how to load and use brushes into Photoshop->)
Wedding Photography

2. Place the first brush on the photo like this:
Wedding Photography
3. Load second brushes set, in this case Photoshop Brushes – Floral Shapes (37)

Wedding Photography
4. Place that second brush it on the top of the first one so that it creates one new shape

Wedding Photography
5. Now, the time has come to color the right part of the image. First we need to make a selection, to do that – use Polygonal Lasso Tool (L)
Wedding Photography
6. Close the path: join beginning and the ending points
Wedding Photography
7. Click on Gradient Tool (G). Now click and on the gradient itself (upper left corner) and adjust the colors until you get something like this (or whatever look you prefer)
Wedding Photography
8. Drag the gradient with the mouse from upper left corner to the bottom right corner
Wedding Photography
9. Add some drop shadow on the first brush to enhance the visual effect. Double click on the layer thumbnail to get the “Layer style Pop-Up window”, checkmark the Drop Shadow box.
Wedding Photography
10. Adjust the drop shadow settings like this

Wedding Photography
And voila!
Add text and here is our newly decorated wedding photo!
Wedding Photography
I hope you liked it! I tried to make it as simple as possible but if there are some steps that are not completely clear please let me know.
Love,

Silvia
P.S.
Of course, don’t forget to browse through my little shop for some cool brushes and stuff :)
http://graphics-illustrations.com/ 

Related Post :
Photoshop Brushes - wedding invitation
Read More

Creating a Realistic Torn Photo Effect

Creating a Realistic Torn Photo Effect – Image Preview
Creating a realistic torn photo effect
In this tutorial you will learn how to take a standard photo of a girl and tear it into pieces using some stock images and some nifty Photoshop techniques.

The image on the left is what your finished product will look like. OK, lets get started…

Before we start, you should download the source files…
Step 1 –
From the downloaded source files, open the image below in Photoshop, and duplicate the layer. On the duplicated layer set the Blend Mode to Screen and open the Blending Options.

Creating a realistic torn photo effect
Step 2 – Drop Shadow Settings
Firstly, we will start by adding some Shadow. Use the settings you see in the image below:
Creating a realistic torn photo effect
Step 3 – Inner Shadow Settings
Then we will need to add some Inner Shadow, using these settings:
Creating a realistic torn photo effect
Step 4 – Inner Glow Settings

… and then some Inner Glow with the following settings:
Creating a realistic torn photo effect
Step 5 – Bevel and Emboss Settings
Finally, a little Bevel and Emboss. Use these settings:
Creating a realistic torn photo effect
Step 6 – Merge layers
Hit OK and now Merge the original or Background layer to the duplicate one. Select the two layers and hit CTRL + ALT + E. You’ll now have a new merge layer.

Creating a realistic torn photo effect
This is the result so far
Creating a realistic torn photo effect
Step 7 – Torn Paper
Now open the below image with the several pieces of torn paper, from the source files.
Creating a realistic torn photo effect
Step 8 – Crop the Torn Paper
You will now need to crop the part that you are going to use, so that it is easier to select. Crop the piece of paper that is on the lower right corner of the torn paper image.
Creating a realistic torn photo effect

Step 9 – Select with the Magic Wand
Now you need to select the piece. You can select the white parts of the image and then invert the selection (CTRL + SHIFT + I). Use the Magic Wand tool to do this.
Creating a realistic torn photo effect
Step 10 – Scale and Rotate
Copy it and paste it onto the image that you are working with. Scale it down and rotate it until you get something like this:

Creating a realistic torn photo effect
Step 11 – Torn Background
Now we need to create the background for the torn photo. Open this image of a piece of cardboard:
Creating a realistic torn photo effect
Step 12 – Torn Background II
Select the white area, invert that selection. Copy and paste it onto the image you’re working on. Scale it and rotate it until it looks like this:

Creating a realistic torn photo effect
Step 13 – Torn Background III
Open again the image with the pieces of torn paper. Crop the yellow one. Select it as shown in the image below and invert that selection.

Remember to remove the clip. You can use the Clone tool or just cut a piece of plain paper and paste it over the clip.

Creating a realistic torn photo effect
Step 14 – Torn Background IV
Paste it onto the document that you were working on and place it as you can see in the below image:
Creating a realistic torn photo effect
Step 15 – Torn Background V
Now, the magic begins.

Set all the torn pieces of paper layers invisible. Now, open once again the image of the torn cardboard. Select the section that looks like a triangle; it’s the brownest part of the image.

Creating a realistic torn photo effect
Step 16 – Torn Background VI
Copy and paste it onto your current document like this:
Creating a realistic torn photo effect
Step 17 – Torn Background VII
CTRL + CLICK on the thumbnail of the piece of torn paper layer. Make it invisible and select the layer of the girl.

Creating a realistic torn photo effect
Step 18 – Copy and Paste the Selection
With the girl layer selected, copy the selection and paste it. Move the layer to the top (it may help to make all the torn paper layers visible). Now, rotate the part you’ve just pasted and move it like you can see in the picture below:
Creating a realistic torn photo effect
Step 19 – CTRL + CLICK
Now, CTRL + CLICK on the yellow piece of torn paper you have on the document.

Creating a realistic torn photo effect
Step 20 – Cut the image of the Girl
Make that layer invisible and use that selection to cut another part of the girl like this:
Creating a realistic torn photo effect
Step 21 – Position the Torn Paper
Copy it, paste it and move it to the top of the layers. Now rotate it a little and move it to the right just like this:

Creating a realistic torn photo effect
Step 22 – Applying Shadow
Now, you will need to apply some shadow to this particular piece. Open the blending options and Drop some shadow using these settings:
Creating a realistic torn photo effect
Step 23 – Positioning another piece of cardboard

You will now need to do something similar with the other cardboard piece. Select the cardboard layer on your left. Make that layer invisible and copy that part of the image of the girl’s layer and paste it. Place it on top of the layers and rotate it and move it so that it looks like the image below. Don’t forget to add some shadow to this piece as well, you can simply copy the layer style and paste it. (Step 22)

Creating a realistic torn photo effect
Step 24 – Repeat the process
This part is up to you. You will need to continue copying and pasteing parts of the photograph, and creating the final image how you would like it. Do this until you’re satisfied with the result, let your creativity rein free!

Continue copying and pasting the torn paper parts, you can even divide a part in two and rotate it like this:
Creating a realistic torn photo effect
Step 25 – Finished

Read More
Read More